
kOps is a widely used tool for deploying and managing Kubernetes clusters in multi-cloud or hybrid cloud environments. It provides a unified configuration system (YAML or JSON), which lets you easy to set up clusters across AWS, GCP, Azure, and on-premises environments.
With flexible customization options, kOps lets you adjust everything from control plane and worker node operating systems to network plugins (like Calico and Cilium) and storage solutions, which makes it a great fit for complex setups.
To optimize Kubernetes resource efficiency, many teams choose Karpenter—an open-source autoscaler that provisions nodes dynamically based on workload demands.
It supports multiple instance types, schedules AWS Spot Instances to cut costs, and eliminates the need for predefined node groups, offering greater flexibility.
However, kOps no longer provides official support for Karpenter, meaning its latest versions require manual setup to integrate with Karpenter.
This blog walks you through the step-by-step process of deploying Karpenter on a kOps-managed AWS Kubernetes cluster, helping you enable automatic scaling and improve resource efficiency.
Prerequisites
Before you begin, ensure you have the following:
- An AWS account with IAM permissions to create EC2 instances.
- AWS CLI installed and configured/
- kubectl (Kubernetes CLI) installed.
- Helm (Kubernetes package manager) installed.
- kOps installed
Create a Cluster with kOps
Configure the Cluster
Before creating the cluster, you need to specify the AWS region and cluster name. To simplify deployment, we will use a Gossip-based DNS cluster:
If you prefer to use your own domain for the cluster, follow the official guide:
🔗 Configure DNS for kOps on AWS
export DEPLOY_REGION="us-west-1"
export CLUSTER_NAME="demo1"
export DEPLOY_ZONE="us-west-1a"

export NAME=${CLUSTER_NAME}.k8s.local
Create a kOps IAM User
To create a Kubernetes cluster with kOps, you need a dedicated IAM user with the necessary permissions. This section will guide you through creating an IAM user named kops using the AWS CLI.
aws iam create-group --group-name kops

aws iam attach-group-policy --policy-arn arn:aws:iam::aws:policy/AmazonEC2FullAccess --group-name kops
aws iam attach-group-policy --policy-arn arn:aws:iam::aws:policy/AmazonRoute53FullAccess --group-name kops
aws iam attach-group-policy --policy-arn arn:aws:iam::aws:policy/AmazonS3FullAccess --group-name kops
aws iam attach-group-policy --policy-arn arn:aws:iam::aws:policy/IAMFullAccess --group-name kops
aws iam attach-group-policy --policy-arn arn:aws:iam::aws:policy/AmazonVPCFullAccess --group-name kops
aws iam attach-group-policy --policy-arn arn:aws:iam::aws:policy/AmazonSQSFullAccess --group-name kops
aws iam attach-group-policy --policy-arn arn:aws:iam::aws:policy/AmazonEventBridgeFullAccess --group-name kops

aws iam create-user --user-name kops
aws iam add-user-to-group --user-name kops --group-name kops
aws iam create-access-key --user-name kops
Export AWS Access Key and Secret Key
To authenticate kOps with AWS, you need to export your Access Key and Secret Key. For simplicity, this guide does not switch users explicitly. You can manually switch to the kOps IAM user using:
export AWS_ACCESS_KEY_ID=$(aws configure get aws_access_key_id)
export AWS_SECRET_ACCESS_KEY=$(aws configure get aws_secret_access_key)
Create an S3 Bucket for Cluster State
kOps requires a dedicated S3 bucket to store cluster state and configuration. This bucket serves as the single source of truth for managing your cluster.
export KOPS_STATE_STORE_NAME=kops-state-store-${CLUSTER_NAME}
export KOPS_OIDC_STORE_NAME=kops-oidc-store-${CLUSTER_NAME}
export KOPS_STATE_STORE=s3://${KOPS_STATE_STORE_NAME}

aws s3api create-bucket \
    --bucket ${KOPS_STATE_STORE_NAME} \
    --region ${DEPLOY_REGION} \
    --create-bucket-configuration LocationConstraint=${DEPLOY_REGION}

aws s3api create-bucket \
    --bucket ${KOPS_OIDC_STORE_NAME} \
    --region ${DEPLOY_REGION} \
    --create-bucket-configuration LocationConstraint=${DEPLOY_REGION} \
    --object-ownership BucketOwnerPreferred
aws s3api put-public-access-block \
    --bucket ${KOPS_OIDC_STORE_NAME} \
    --public-access-block-configuration BlockPublicAcls=false,IgnorePublicAcls=false,BlockPublicPolicy=false,RestrictPublicBuckets=false
aws s3api put-bucket-acl \
    --bucket ${KOPS_OIDC_STORE_NAME} \
    --acl public-read
Create the Cluster
The following command creates the cluster configuration without starting the build process. This is the most basic example:
kops create cluster \
    --name=${NAME} \
    --cloud=aws \
    --node-count=1 \
    --control-plane-count=1 \
    --zones=${DEPLOY_ZONE} \
    --discovery-store=s3://${KOPS_OIDC_STORE_NAME}/${NAME}/discovery
We are now at the final step of building the cluster, which may take a while. Once the process is complete, you'll need to wait for the instances to finish downloading the Kubernetes components and reach the Ready state.
kops update cluster --name ${NAME} --yes --admin
kops export kubeconfig
# waiting for Ready
kops validate cluster --wait 10m --name ${NAME}
Deploy Karpenter
Prepare
Before deploying Karpenter, you'll need to set up several environment variables for configuring NodePool and NodeClass.
Use the AWS CLI to retrieve the OIDC Provider information, including the Issuer URL and AWS Account ID, to ensure smooth deployment:
export OIDC_PROVIDER_ID=$(aws iam list-open-id-connect-providers \
    --query "OpenIDConnectProviderList[?contains(Arn, '${NAME}')].Arn" \
    --output text | awk -F'/' '{print $NF}')
export OIDC_ISSUER=${KOPS_OIDC_STORE_NAME}.s3.${DEPLOY_REGION}.amazonaws.com/${NAME}/discovery/${NAME}

export AWS_ACCOUNT_ID=$(aws sts get-caller-identity --query 'Account' \
    --output text)

export AWS_INSTANCE_PROFILE_NAME=nodes.${NAME}
export KARPENTER_ROLE_NAME=karpenter.kube-system.sa.${NAME}
export CLUSTER_ENDPOINT=$(kubectl config view -o jsonpath="{.clusters[?(@.name=='${NAME}')].cluster.server}")

# Storage of temporary documents for subsequent needs
export TMP_DIR=$(mktemp -d)
Create a Karpenter IAM Role
To allow Karpenter to dynamically manage AWS resources (such as EC2 instances) based on Kubernetes workload requirements, you need to create a dedicated IAM Role with the appropriate policies. This role will use OIDC authentication to grant Karpenter the necessary permissions.
aws iam create-role \
    --role-name ${KARPENTER_ROLE_NAME} \
    --assume-role-policy-document "{
        \"Version\": \"2012-10-17\",
        \"Statement\": [
            {
                \"Effect\": \"Allow\",
                \"Principal\": {
                    \"Federated\": \"arn:aws:iam::${AWS_ACCOUNT_ID}:oidc-provider/oidc.eks.${DEPLOY_REGION}.amazonaws.com/id/${OIDC_PROVIDER_ID}\"
                },
                \"Action\": \"sts:AssumeRoleWithWebIdentity\",
                \"Condition\": {
                    \"StringEquals\": {
                        \"oidc.eks.${DEPLOY_REGION}.amazonaws.com/id/${OIDC_PROVIDER_ID}:sub\": \"system:serviceaccount:kube-system:karpenter\"
                    }
                }
            }
        ]
    }"

aws iam create-role \
    --role-name ${KARPENTER_ROLE_NAME} \
    --assume-role-policy-document "{
        \"Version\": \"2012-10-17\",
        \"Statement\": [
            {
                \"Effect\": \"Allow\",
                \"Principal\": {
                    \"Federated\": \"arn:aws:iam::${AWS_ACCOUNT_ID}:oidc-provider/${KOPS_OIDC_STORE_NAME}.s3.us-west-1.amazonaws.com/${NAME}/discovery/${NAME}\"
                },
                \"Action\": \"sts:AssumeRoleWithWebIdentity\",
                \"Condition\": {
                    \"StringEquals\": {
                        \"${OIDC_ISSUER}:sub\": \"system:serviceaccount:kube-system:karpenter\"
                    }
                }
            }
        ]
    }"

aws iam put-role-policy \
    --role-name ${KARPENTER_ROLE_NAME} \
    --policy-name InlineKarpenterPolicy \
    --policy-document '{
        "Version": "2012-10-17",
        "Statement": [
            {
                "Effect": "Allow",
                "Action": [
                    "ec2:CreateFleet",
                    "ec2:CreateTags",
                    "ec2:DescribeAvailabilityZones",
                    "ec2:DescribeImages",
                    "ec2:DescribeInstanceTypeOfferings",
                    "ec2:DescribeInstanceTypes",
                    "ec2:DescribeInstances",
                    "ec2:DescribeLaunchTemplates",
                    "ec2:DescribeSecurityGroups",
                    "ec2:DescribeSpotPriceHistory",
                    "ec2:DescribeSubnets",
                    "ec2:RunInstances",
                    "ec2:TerminateInstances",
                    "iam:PassRole",
                    "pricing:GetProducts",
                    "ssm:GetParameter",
                    "ec2:CreateLaunchTemplate",
                    "ec2:DeleteLaunchTemplate",
                    "sts:AssumeRoleWithWebIdentity"
                ],
                "Resource": "*"
            }
        ]
    }'
Deploy Karpenter
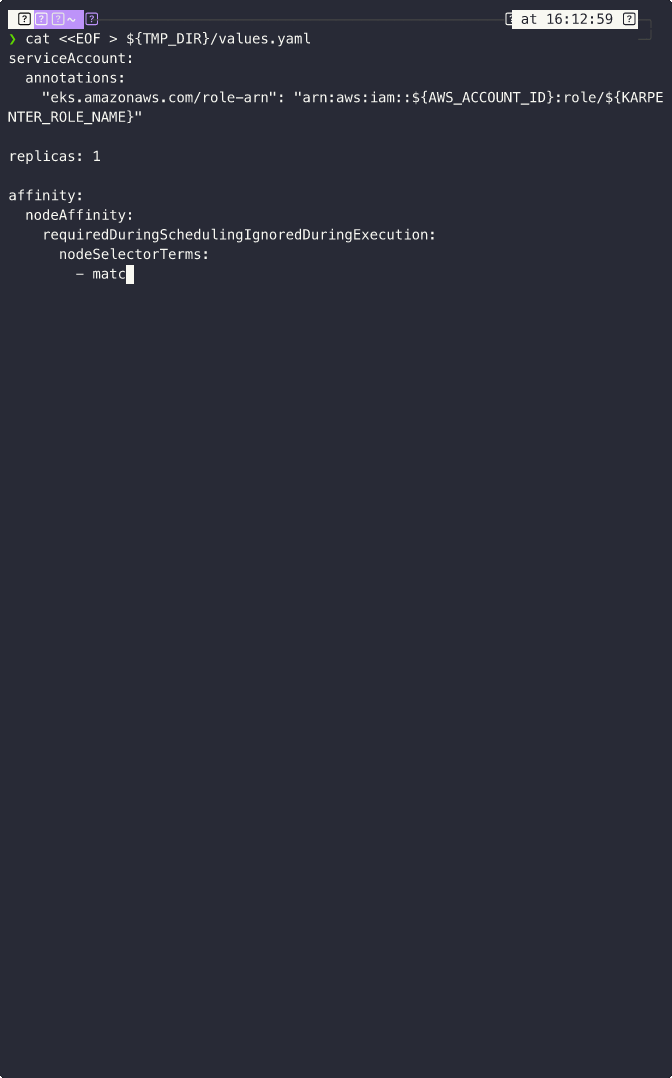
First, we need to configure additional settings to restrict Karpenter to run only on the control plane, and bind it to the resources we set up earlier, such as the clusterEndpoint, clusterName, and most importantly, the IAM Role.
cat <<EOF > ${TMP_DIR}/values.yaml
serviceAccount:
  annotations:
    "eks.amazonaws.com/role-arn": "arn:aws:iam::${AWS_ACCOUNT_ID}:role/${KARPENTER_ROLE_NAME}"

replicas: 1

affinity:
  nodeAffinity:
    requiredDuringSchedulingIgnoredDuringExecution:
      nodeSelectorTerms:
        - matchExpressions:
          - key: node-role.kubernetes.io/control-plane
            operator: Exists
  podAntiAffinity:
    requiredDuringSchedulingIgnoredDuringExecution:
      - topologyKey: "kubernetes.io/hostname"

tolerations:
  - key: CriticalAddonsOnly
    operator: Exists
  - key: node-role.kubernetes.io/master
    operator: Exists
  - key: node-role.kubernetes.io/control-plane
    operator: Exists
  - effect: NoExecute
    key: node.kubernetes.io/not-ready
    operator: Exists
    tolerationSeconds: 300
  - effect: NoExecute
    key: node.kubernetes.io/unreachable
    operator: Exists
    tolerationSeconds: 300

extraVolumes:
  - name: token-amazonaws-com
    projected:
      defaultMode: 420
      sources:
        - serviceAccountToken:
            audience: amazonaws.com
            expirationSeconds: 86400
            path: token

controller:
  containerName: controller
  image:
    repository: docker.io/vacanttt/kops-karpenter-provider-aws
    tag: latest
    digest: sha256:24ef24de6b5565df91539b7782f3ca0e4f899001020f4c528a910cefb3b1c031
  env:
    - name: AWS_REGION
      value: us-west-1
    - name: AWS_DEFAULT_REGION
      value: us-west-1
    - name: AWS_ROLE_ARN
      value: arn:aws:iam::${AWS_ACCOUNT_ID}:role/${KARPENTER_ROLE_NAME}
    - name: AWS_WEB_IDENTITY_TOKEN_FILE
      value: /var/run/secrets/amazonaws.com/token
  extraVolumeMounts:
    - mountPath: /var/run/secrets/amazonaws.com/
      name: token-amazonaws-com
      readOnly: true

logLevel: debug

settings:
  clusterName: ${NAME}
  clusterEndpoint: ${CLUSTER_ENDPOINT}
  featureGates:
    spotToSpotConsolidation: true
    nodeRepair: false
EOF
To deploy Karpenter to the kube-system namespace, you can use the following Helm commands:
export KARPENTER_NAMESPACE="kube-system"

helm upgrade --install karpenter \
  oci://public.ecr.aws/karpenter/karpenter \
  --namespace "${KARPENTER_NAMESPACE}" --create-namespace \
  --wait -f $TMP_DIR/values.yaml
Create NodePool/NodeClass
To register new nodes with your cluster, you need to use the LaunchTemplate managed by kOps and configure its userData for the Karpenter EC2NodeClass. Follow the commands:
export NODE_INSTANCE_GROUP=$(kops get instancegroups --name ${NAME} | grep Node | awk '{print $1}')
export NODE_LAUNCH_TEMPLATE_NAME=${NODE_INSTANCE_GROUP}.${NAME}

export USER_DATA=$(aws ec2 describe-launch-templates --region ${DEPLOY_REGION} --filters Name=launch-template-name,Values=${NODE_LAUNCH_TEMPLATE_NAME} \
    --query "LaunchTemplates[].LaunchTemplateId" --output text | \
    xargs -I {} aws ec2 describe-launch-template-versions --launch-template-id {} --region ${DEPLOY_REGION} \
    --query "LaunchTemplateVersions[].LaunchTemplateData.UserData" --output text | base64 --decode)
Before applying the NodeClass and NodePool configurations, you can temporarily store them for review or additional configuration.
cat <<EOF > ${TMP_DIR}/nodeclass.yaml
apiVersion: karpenter.k8s.aws/v1
kind: EC2NodeClass
metadata:
  name: default
spec:
  associatePublicIPAddress: true
  amiFamily: AL2
  tags:
    kops.k8s.io/instancegroup: ${NODE_INSTANCE_GROUP}
    KubernetesCluster: ${NAME}
    k8s.io/role/node: "1"
    aws-node-termination-handler/managed: ""
    k8s.io/cluster-autoscaler/node-template/label/node-role.kubernetes.io/node: ""
  subnetSelectorTerms:
    - tags:
        KubernetesCluster: ${NAME}
  securityGroupSelectorTerms:
    - tags:
        Name: nodes.${NAME}
        KubernetesCluster: ${NAME}
  amiSelectorTerms:
    - name: "ubuntu/images/hvm-ssd/ubuntu-jammy-22.04-amd64-server-20241211"
  instanceProfile: nodes.${NAME}
  userData: |
$(echo "$USER_DATA" | sed 's/^/    /')
EOF

cat <<EOF > ${TMP_DIR}/nodepool.yaml
apiVersion: karpenter.sh/v1
kind: NodePool
metadata:
  name: default
spec:
  template:
    spec:
      requirements:
        - key: kubernetes.io/arch
          operator: In
          values: ["amd64"]
        - key: kubernetes.io/os
          operator: In
          values: ["linux"]
        - key: karpenter.sh/capacity-type
          operator: In
          values: ["on-demand", "spot"]
      nodeClassRef:
        group: karpenter.k8s.aws
        kind: EC2NodeClass
        name: default
      expireAfter: 720h
  limits:
    cpu: 4
  disruption:
    consolidationPolicy: WhenEmptyOrUnderutilized
    consolidateAfter: 1m
EOF
Apply NodeClass and NodePool to the cluster:
kubectl apply -f ${TMP_DIR}/nodeclass.yaml
kubectl apply -f ${TMP_DIR}/nodepool.yaml
Create a Workload to Test AutoScaling
To test Karpenter's autoscaling functionality, create a Workload with 4 replicas that request specific resources. In this scenario, 2 replicas should be Pending due to insufficient resources.
cat <<EOF > ${TMP_DIR}/workload.yaml
apiVersion: apps/v1
kind: Deployment
metadata:
  name: workload
  namespace: default
  labels:
    app: workload
spec:
  replicas: 4
  selector:
    matchLabels:
      app: workload
  template:
    metadata:
      labels:
        app: workload
    spec:
      containers:
        - name: pause
          image: public.ecr.aws/eks-distro/kubernetes/pause:3.7
          resources:
            requests:
              cpu: "550m"
              memory: "128Mi"
EOF
kubectl apply -f ${TMP_DIR}/workload.yaml
You can check if any NodeClaims have been created. After approximately 70s of NodeClaim creation, new nodes will be registered to the cluster.

Delete the Cluster
Running a Kubernetes cluster on AWS incurs ongoing costs. If you've completed your experiment, you may want to delete the cluster to avoid unnecessary charges.
To permanently delete your cluster, use the following command with the --yes flag.
kops delete cluster --name ${NAME} --yes
⚠ Warning: This command is destructive—it will remove your entire cluster and all associated resources. Ensure you have backed up any important data before proceeding.
Conclusion
The combination of kOps and Karpenter brings powerful automation to Kubernetes cluster management but also comes with certain limitations.
Advantages
Karpenter dynamically provisions nodes based on actual Pod requirements, improving resource utilization and enabling a rapid response to workload changes. This helps prevent both resource waste and shortages.
Additionally, it supports a wide range of instance types, allowing users to select the most suitable option for their workloads to optimize performance and cost.
Limitations
However, this setup has some constraints. Since EKS’s bootstrap.sh script cannot be used, Kubelet configurations are controlled by kOps, preventing custom Kubelet parameters within NodeClass.
Additionally, the control plane nodes must be managed via Auto Scaling Groups (ASG) rather than Karpenter, limiting their flexibility.
Moreover, Karpenter requires at least one InstanceGroup to function properly—without it, new nodes will fail to register with the cluster, adding to the configuration complexity.
Despite these limitations, kOps and Karpenter remain a powerful combination for dynamic scaling and multi-instance support.
However, a careful planning is required to address these constraints and ensure a smooth deployment.
If you are interested in more details about this tutorial, welcome to join our Slack channel or Discord.


